How to Connect Wallet on PERPTools: The First Step to Trading
Connecting a wallet is the very first step for a trader to get a full experience on PERPTools. You can easily create your potential tokens/trades lists, configuring orders, and interacting with almost every metric displayed on the PERPTools’ user interface.
This article will guide you through a step-by-step instruction on how to connect wallet and why PERPTools keeps it simple.
Why Need to Connect Wallets?
Besides receiving a complete experience of the trading ecosystem onPERPTools, users need to connect wallets to prove they control the funds they are about to trade with. PERPTools uses signature-based authorization—you sign a message proving ownership without executing any transaction. No gas fees. No on-chain activity. Just verification.
Once verified, your wallet address appears on the dashboard and trading controls unlock. Until then, you're viewing markets as a spectator.
How to Connect Wallet on PERPTools: 6 Steps
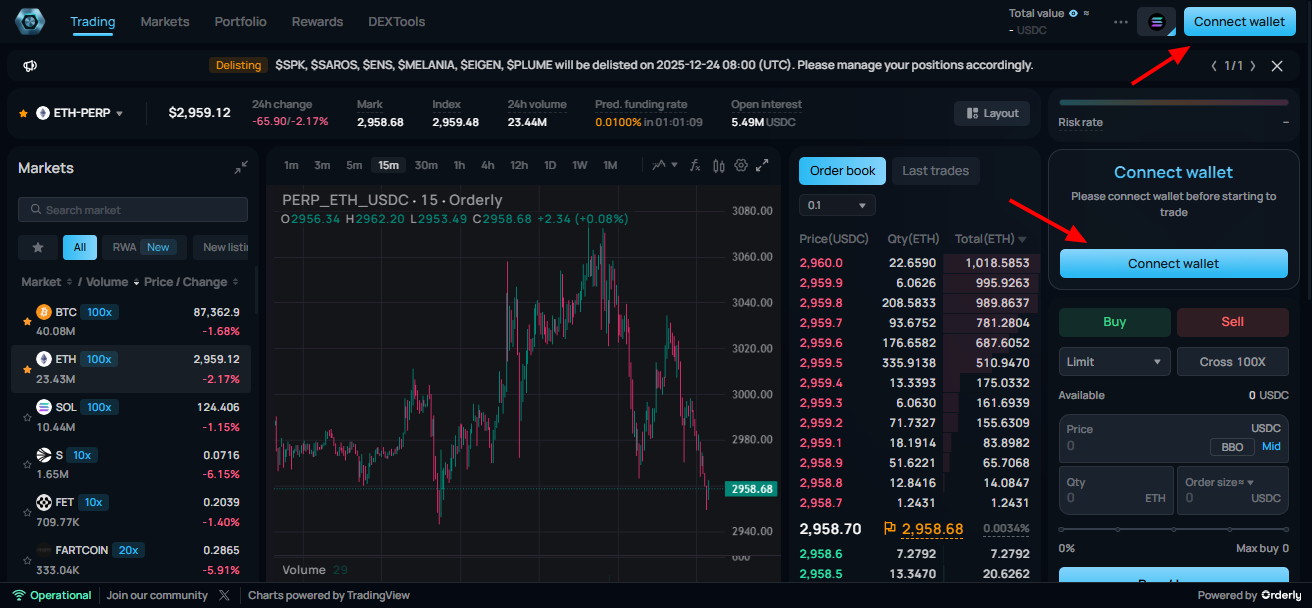
Step1: Navigate and Click ‘Connect wallet’
Once launching the app, users may find on PERPTools trading UI some ‘Connect Wallet’ buttons. These can be seen at the top right of the dashboard, inside the Order section or at the bottom of the page in your Positions. Click on one of these and you will see a pop up appears as below:
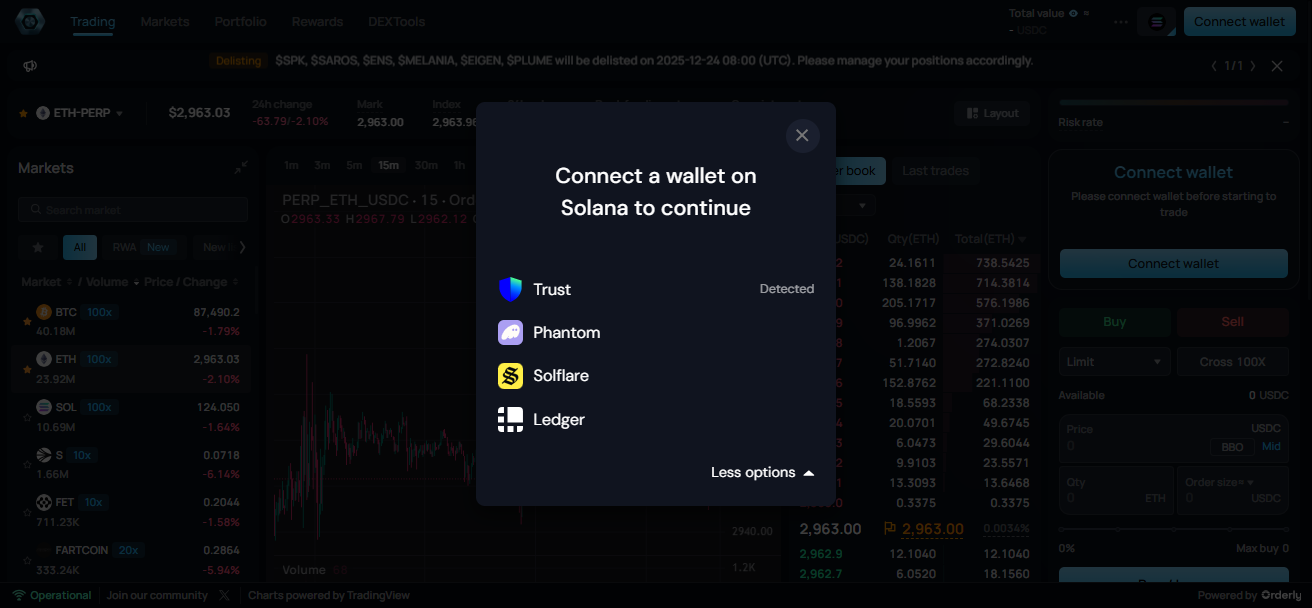
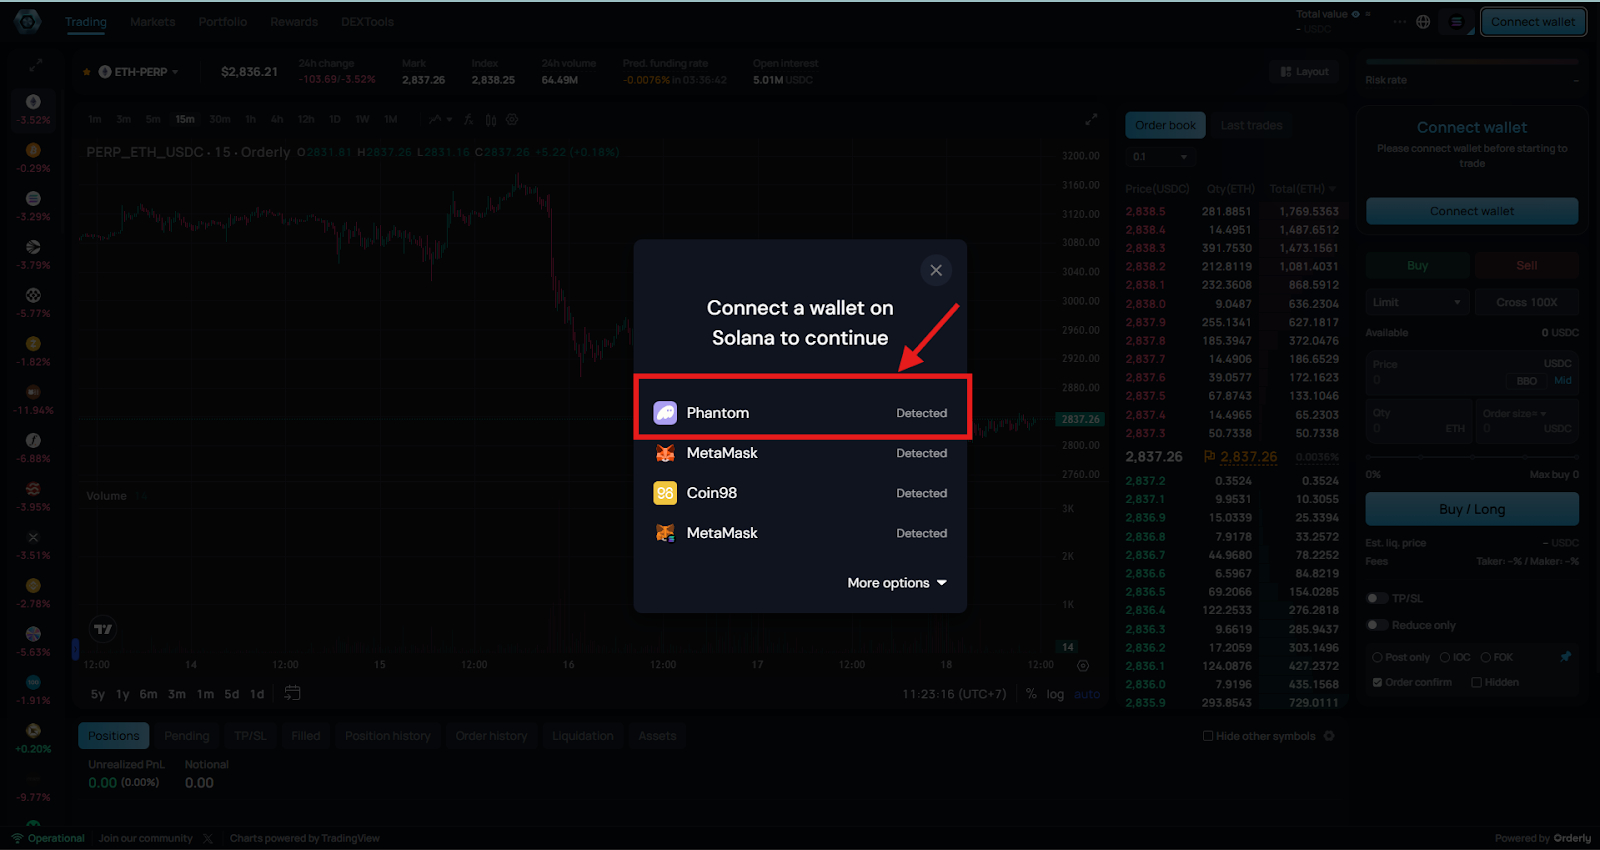
Step2: Select a detected wallet
Choose a detected wallet from the list you see, including Trust, Phantom, Solflare, or Ledger. Detection happens automatically, keeping selection fast and focused. If the wallet you want to connect doesn’t appear as ‘Detected’ but you have it all set up, please click on it; you will be directed to the wallet’s site for configuration.
Otherwise, feel free to choose one and you’ll see interfaces based on your selected option. Example comes as:
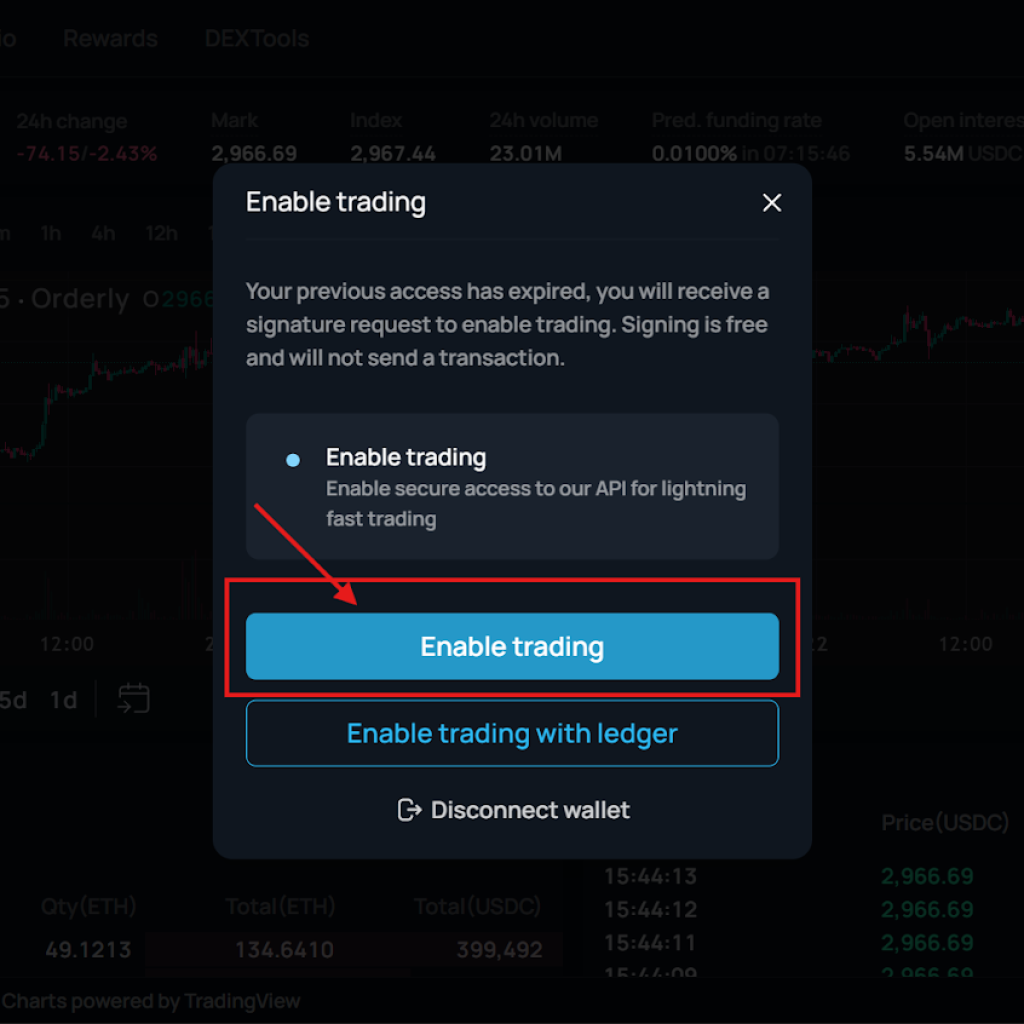
Step 3: Enable trading
Select Enable trading to authorize execution access through a signature, allowing the system to recognize intent without initiating a transaction.
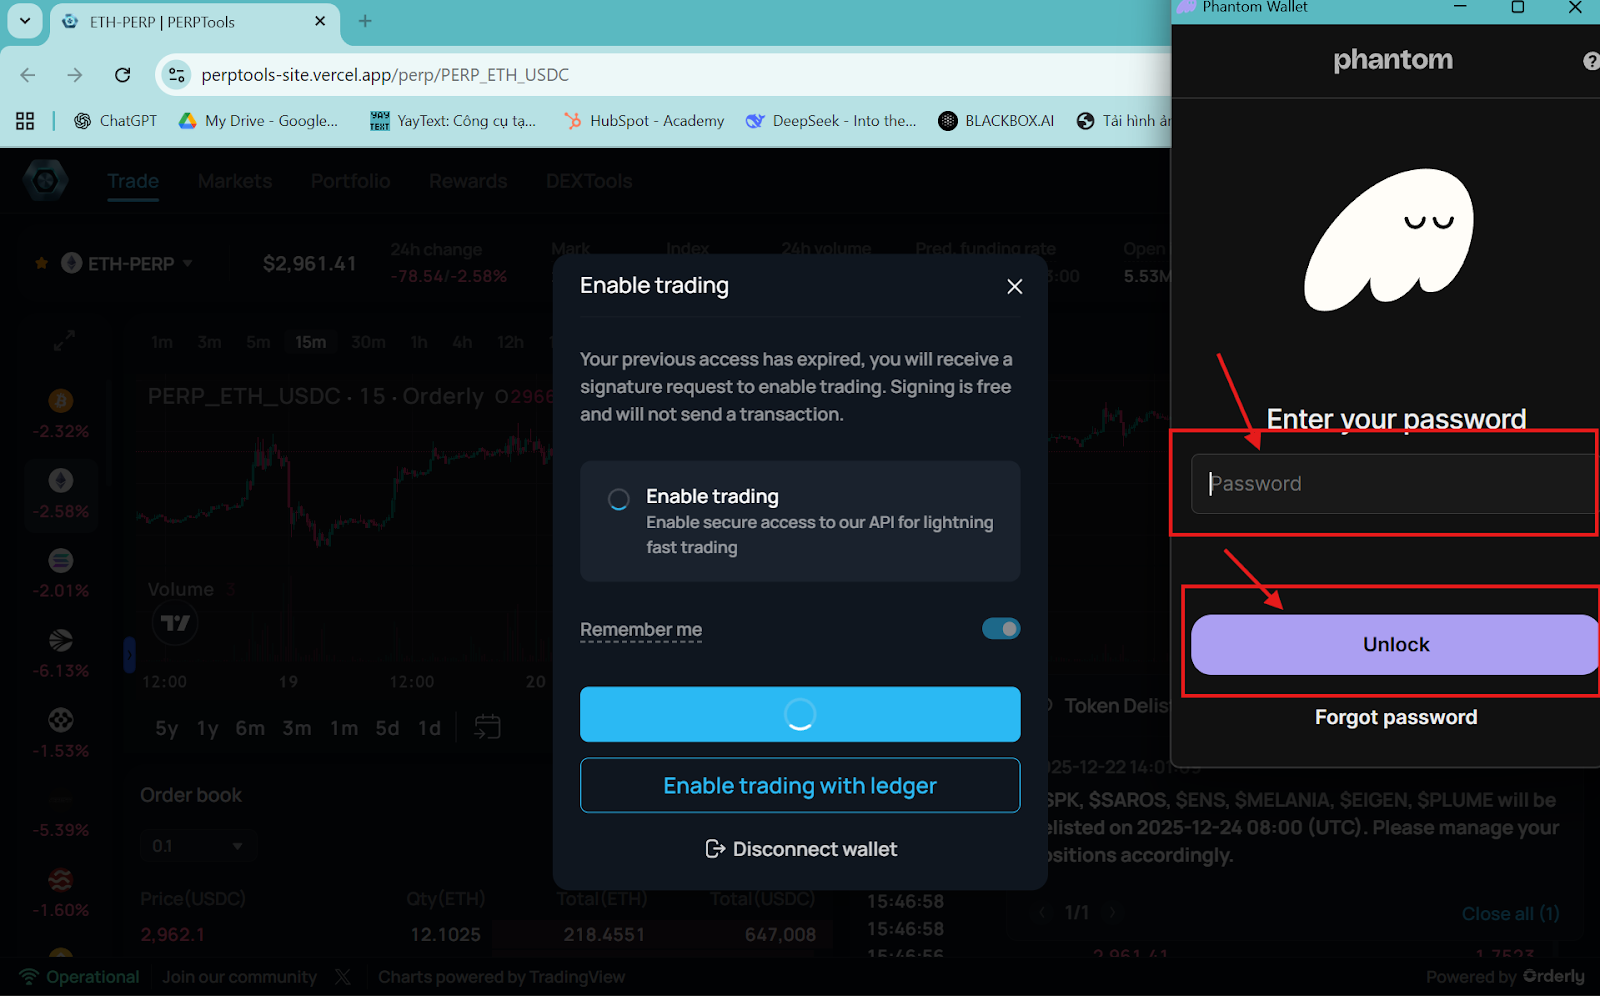
Step 4: Unlock wallet access
Unlock the wallet to confirm ownership and identity, ensuring access verification completes.
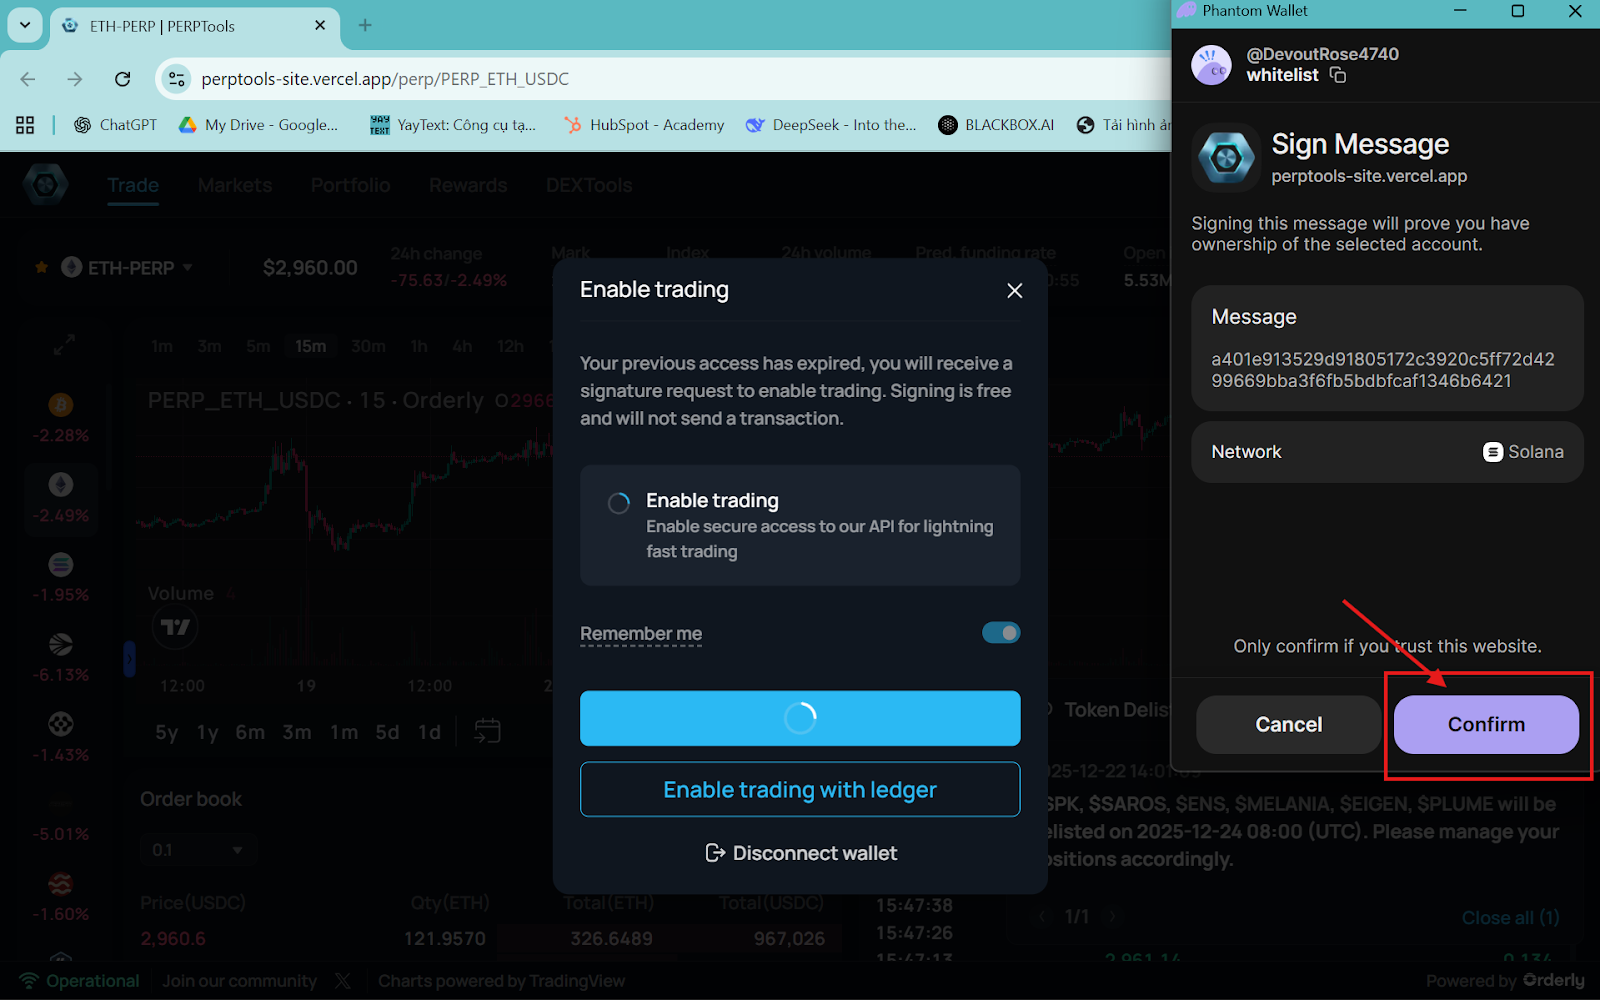
Step 5: Confirm the signature
Approve the message inside the wallet so ownership verification finalizes and execution permission becomes active.
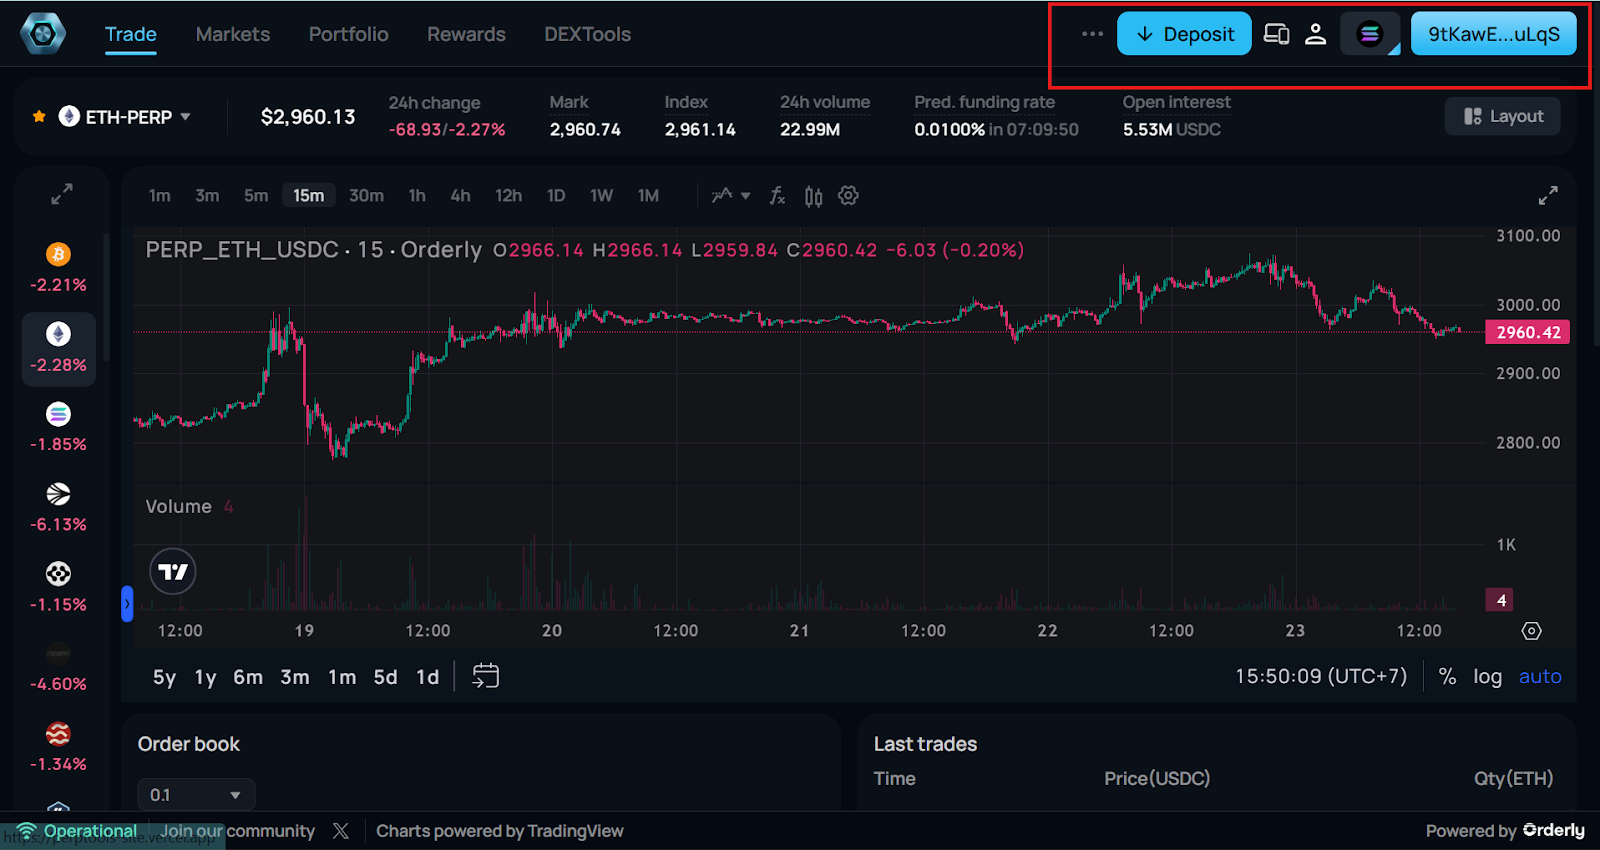
Step 6: Trading board becomes live
The wallet is now connected and fully recognized by the system. You can begin trading immediately.
FAQ
1. Does connecting a wallet move your funds?
No, connecting a wallet does not move your funds. The process only verifies ownership and does not trigger a transaction.
2. Is a signature the same as a transaction?
No, a signature isn’t a transaction. It just confirms intent and control without changing on-chain state or generating gas fees.
3. What changes after the wallet is connected?
Yes, after the wallet is connected, the trading board becomes active. Balances appear, execution controls unlock, and orders can be placed.
4. Does connecting a wallet affect charts or market data?
No, charts and market state continue updating without interruption during the connection process.
5. Can trading begin immediately after connection?
Yes, once execution permission is active, trading can begin right away.
6. What happens if the wallet disconnects during trading?
Yes, execution access is removed until reconnection, while existing positions remain visible and unchanged.
Conclusion
Wallet connection marks the point where trading becomes actionable. Once access is active, the platform responds to intent rather than observation.
Open the trading dashboard. Connect your wallet. When ready, place the first order and move from analysis to execution.